Route

5 Days Kilimanjaro Climbing

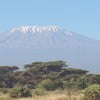
Mountain: Kilimanjaro (5 895 m / 19 341 ft)
Activity type: Hiking
Activity level: Moderate/ Challenging
Elevation: 5 895 m / 19 341 ft
Duration: 5 Day(s)
Expenses: from$ 2 000

Overview

Route Name:
5 Days Kilimanjaro Climbing, 5 Days Kilimanjaro Climbing is the only uncomplicated to Uhuru peak on Mount Kilimanjaro Climbing because of its gentle slopes but need optional acclimatization day that one can reschedule to 6 days. The Marangu route is known as Coca-Cola Route meaning simple like Coca cola.5 Days Kilimanjaro Climbing Day 1: Marangu Gate to Mandara Hut. Take a short drive from Arusha town to the Kilimanjaro Park Gate (1,830 m.) lies at the edge of Marangu, which is an attractive village with many small coffee and banana plantations. After completing the entrance formalities, we climb up through attractive and unspoiled forest to reach the clearing containing Mandara Hut (2,700 m.). The volcanic remains of Maundi Crater are nearby, and make a good afternoon excursion. An alternative is to rest and enjoy the beautiful forest. There is a rich birdlife at the huts and monkeys are often seen as well. [3-5 hours walking to Mandara Hut] Day 2: Mandara Hut to Horombo Hut The first part of the walk is a steep ascent through forest, but the path soon opens out into grassy moorland and, in clear weather, there are good views of Kibo and Mawenzi peaks. We climb steadily through the moorland zone, containing giant heather and occasional stands of groundsel, to eventually reach Horombo Hut (3,720 m.). Sunrises and sunsets here are often very stunning, the site is close to the glaciated dome of Kibo, and there is a real sense of being above the clouds. [4-6 hours walking from Mandara Hut to Horombo Hut] Day 3: Horombo Hut to Kibo Hut We climb very gradually towards the lunar desert of the Saddle between Mawenzi and Kibo. The terrain changes to screed and there is a palpable sense of high altitude wilderness. We usually reach Kibo Hut (4,700 m.) at the bottom of the crater wall by midday and the afternoon is free (to contemplate the summit ascent!!). The remainder of the day is spent resting and eating in preparation for the final climb before a very early night! [4-5 hours walking from Horombo Hut to Kibo Hut] Day 4: Summit Day then down to Horombo Hut We will start our ascent by torchlight at about 1 a.m. so that we can be up at Gillman’s Point by sunrise. The initial climb is steep over loose volcanic screen, but there are some well-graded zigzag and a slow but steady pace will have us up to Gillman’s (5,685 m.) in about five or six hours. We will rest there and spend some time taking in the sunrise. Those who are still feeling strong can make the three hour round trip from here along the crater rim to Uhuru Peak (5,896 m.), passing close to the spectacular glaciers that still occupy most of the summit area. The descent is surprisingly fast and we return to Horombo Hut for the night. [11-15 hours walking from Kibo Hut to Gillman’s Point] Day 5: Horombo Hut – Arusha After breakfast,we will start with a pleasant moorland walk to Mandara and then a lovely forest walk to the National Park gates to Arusha town. The greenness and lushness of the forest is quite a stunning contrast to the summit day, and it really makes you realize how varied the scenery on Kilimanjaro really is. [5-6 hours walking] 1 Pax $ 1800 | 2 – 3 Pax $ 1395 per person | 4 – 6 Pax 1320 per person | 8 – 10 pax $ 1250 pp Included in this tour: 2 nights’ accommodation at Peace Hotel. All nights’ accommodation in Huts. Professional, experienced, mountain guides. All Park fees and Rescue fees. All meals while on the Mountain. Arrival and Departure transfers. Guides, Porters, cook salaries and park fees. Large portions of fresh, healthy, nutritious food. Clean, purified drinking water. Fair and ethical treatment of porters. Sleeping Mattress. Excludes: Tanzania Visa: $50 per person on arrival. Personal Expenses. Optional Tours. Tips and any items of personal nature. Book This Tour
Activity type:
Hiking
Activity level:
Moderate/ Challenging
Type of Climb:
Trekking
Location:
Africa, Tanzania
Starting Point:
Parent Range: Please update
Mountain:
First Ascent:
6/11/2005
Duration:
5 Day(s)
Max. Elevation:
5 895m / 19 341 ft
Vertical Gain:
1 000m / 3 281 ft
Length:
70km / 43 miles
Climbing Season(s):
31 May-31 Dec;
01 Jan-31 Mar;
Nearst
Airport(s):
Convenience Center(s):
National
Park(s):

Location

Africa, Tanzania
  • Your Chance To Edit •  Add / Share you knowledge with mates

  • Description Edit •  Add / Share you knowledge with mates

    5 Days Kilimanjaro Climbing is the only uncomplicated to Uhuru peak on Mount Kilimanjaro Climbing because of its gentle slopes but need optional acclimatization day that one can reschedule to 6 days. The Marangu route is known as Coca-Cola Route meaning simple like Coca cola.5 Days Kilimanjaro Climbing Day 1: Marangu Gate to Mandara Hut. Take a short drive from Arusha town to the Kilimanjaro Park Gate (1,830 m.) lies at the edge of Marangu, which is an attractive village with many small coffee and banana plantations. After completing the entrance formalities, we climb up through attractive and unspoiled forest to reach the clearing containing Mandara Hut (2,700 m.). The volcanic remains of Maundi Crater are nearby, and make a good afternoon excursion. An alternative is to rest and enjoy the beautiful forest. There is a rich birdlife at the huts and monkeys are often seen as well. [3-5 hours walking to Mandara Hut] Day 2: Mandara Hut to Horombo Hut The first part of the walk is a steep ascent through forest, but the path soon opens out into grassy moorland and, in clear weather, there are good views of Kibo and Mawenzi peaks. We climb steadily through the moorland zone, containing giant heather and occasional stands of groundsel, to eventually reach Horombo Hut (3,720 m.). Sunrises and sunsets here are often very stunning, the site is close to the glaciated dome of Kibo, and there is a real sense of being above the clouds. [4-6 hours walking from Mandara Hut to Horombo Hut] Day 3: Horombo Hut to Kibo Hut We climb very gradually towards the lunar desert of the Saddle between Mawenzi and Kibo. The terrain changes to screed and there is a palpable sense of high altitude wilderness. We usually reach Kibo Hut (4,700 m.) at the bottom of the crater wall by midday and the afternoon is free (to contemplate the summit ascent!!). The remainder of the day is spent resting and eating in preparation for the final climb before a very early night! [4-5 hours walking from Horombo Hut to Kibo Hut] Day 4: Summit Day then down to Horombo Hut We will start our ascent by torchlight at about 1 a.m. so that we can be up at Gillman’s Point by sunrise. The initial climb is steep over loose volcanic screen, but there are some well-graded zigzag and a slow but steady pace will have us up to Gillman’s (5,685 m.) in about five or six hours. We will rest there and spend some time taking in the sunrise. Those who are still feeling strong can make the three hour round trip from here along the crater rim to Uhuru Peak (5,896 m.), passing close to the spectacular glaciers that still occupy most of the summit area. The descent is surprisingly fast and we return to Horombo Hut for the night. [11-15 hours walking from Kibo Hut to Gillman’s Point] Day 5: Horombo Hut – Arusha After breakfast,we will start with a pleasant moorland walk to Mandara and then a lovely forest walk to the National Park gates to Arusha town. The greenness and lushness of the forest is quite a stunning contrast to the summit day, and it really makes you realize how varied the scenery on Kilimanjaro really is. [5-6 hours walking] 1 Pax $ 1800 | 2 – 3 Pax $ 1395 per person | 4 – 6 Pax 1320 per person | 8 – 10 pax $ 1250 pp Included in this tour: 2 nights’ accommodation at Peace Hotel. All nights’ accommodation in Huts. Professional, experienced, mountain guides. All Park fees and Rescue fees. All meals while on the Mountain. Arrival and Departure transfers. Guides, Porters, cook salaries and park fees. Large portions of fresh, healthy, nutritious food. Clean, purified drinking water. Fair and ethical treatment of porters. Sleeping Mattress. Excludes: Tanzania Visa: $50 per person on arrival. Personal Expenses. Optional Tours. Tips and any items of personal nature. Book This Tour
  • Getting There Edit •  Add / Share you knowledge with mates

    Getting to Tanzania, Flying to Tanzania, There are frequent direct and indirect flights to Tanzania by numerous international airlines.Getting to Tanzania International airlines that fly to Dar es Salaam include KLM Royal Dutch Airlines, Swiss International Airlines, Emirates,Qatar Airways, Oman Air,Turkish Airlines,South African Airways, Ethiopian Airlines, Egypt Airways, Kenya Airways, Air Uganda, LAM Mozambique Airlines and Rwanda Air. Departure tax: The international departure tax is US$50 but this is included in the price of an airline ticket. Travel by Rail and Boat Travel by rail there are two railway lines. Tanzania – Zambia Railway which is run by the Tanzania and Zambia Railway Authority (Tazara) (tel: (022) 286 2033; www.tazarasite.com) and the Central line – Tanzania Railway line owned by Tanzania Railway corporation. By rail note: Tanzania – Zambia Railway Authority (TAZARA), its train journey from Dar es Salaam to Kapirimposhi – Zambia is very long (around 50 hours) and there are frequent delays. Always travel in First Class in a two or four sleeper compartment. When the train crosses the border between the two countries, immigration officials board the train to complete border formalities. The central line between Kigoma and Dar es Salaam carries international freight and passengers in transit from Burundi, DR Congo and Rwanda to the Indian Ocean, and the branch from Tabora to Mwanza carries freight and passengers between Uganda and the Indian Ocean.train from Dar es salaam to Kigoma, Mpanda and Mwanza Getting to Tanzania by boat The main port is Dar es Salaam (http://www.tanzaniaports.com) which is served by commercial ships but no passenger services from other countries. It does however serve as the departure point for ferry services to Zanzibar. Cruise ships: Some cruise ships dock at Zanzibar. Ferry operators: Passenger ferry services run on Lake Tanganyika to Mpulungu (Zambia). They also used to run to Bujumbura (Burundi), and this service is likely to start up again in the future. There is sporadic and unreliable ferry service on Lake Nyasa linking Tanzania with Malawi. Book This Tour
  • Are You Ready? Edit •  Add / Share you knowledge with mates

  • Tips Edit •  Add / Share you knowledge with mates

    Cellular Network: Yes (Accomodation)

    Mobile Internet: Yes (To all the huts, you can get network but it varies)


    Equipment’s Lists, getting the right Kilimanjaro equipment will make a dent in your budget. But there is no way around it; you need good gear for Kilimanjaro. Being cold, wet and miserable does not increase your summit chances.Equipment’s Lists Equipment lists – What Kilimanjaro gear to take and why The Kilimanjaro equipment list below has all the essential gear that you need for your Kilimanjaro climb. It tells you why you need it and a bit about the different options you have when buying equipment specifically for your Kilimanjaro climb. Camping Equipment for Kilimanjaro Any half decent Kilimanjaro tour operator should supply the tents. Tents on Kilimanjaro need to be able to take a beating, so if you have to take your own, make sure it is one that is meant for such conditions (extended bad weather, strong winds and very rocky ground). You cannot afford to have any leaks or tears, zips that don’t keep wind out etc. Invest in a good thermal sleeping mat. Often you can hire those from the operators. You don’t need this on the Marangu route. You still need a good sleeping bag, though. Invest in a good sleeping bag that’s rated for at least -10°C/four seasons. Down sleeping bags are great. They are light, pack down small and definitely keep you warm at night, but down is of course expensive. Again, you can usually hire sleeping bags, since the real warm ones don’t come cheap and most people will not need theirs again after this trek. A sleeping bag liner can help with temperatures. I have a silk liner and it makes a huge difference at the higher camps. I wake up every time it slips of my shoulders. A liner is also good for people who are squeamish about renting a sleeping bag. (Or if you plan to backpack through Tanzania before or after and stay in more dubious accommodation.)You can also get more expensive fleecy liners that are made specifically for warmth and are made from the same material as the filling of synthetic sleeping bags. They may be a good option if you already have a good three season’s bag. Footwear – Boots The most important piece of equipment for Kilimanjaro is a pair of good Gore-Tex trekking boots. Some people recommend leather, but leather is much heavier and the weight on your feet makes a big difference in the amount of energy you expend when walking. The boots need to be absolutely waterproof and breathable, very comfortable, and well-worn in, The very last things you need are blisters or sore feet! If you buy new boots, make sure they are big enough to accommodate the extra pair(s) of socks you’ll be wearing during summit night. If boots are too tight it hinders circulation and your feet freeze… Also make sure boots are high enough. You will need that ankle support, especially on the descent from the summit. Take thick, thermal socks (two pairs) and thinner/normal socks. If your feet tend to sweat you need a fresh pair (or freshly rinsed and dried pair) every day. Salt means grit and abrasion. Make sure you always wear dry socks. Keeping your feet in good condition is essential. Outer Clothing Layers Good Rain protection is also essential equipment on Kilimanjaro. Once your gear is wet you have no hope of drying it again, and there is a very good chance that you’ll get rained on on the first day or two. This outermost layer should be high quality and breathable, and big enough to go over all your other clothes on summit night (when it will keep the wind off and add warmth).Get rain protection for your pack as well. Either get an outer cover or make sure everything inside is protected in plastic bags. (My rain jacket is big enough to wear over my day pack. As for my other Kilimanjaro equipment, I only climb with quality operators who will ensure that while on Kilimanjaro, my gear is protected from moisture. Find out how your Kilimanjaro tour company carries your stuff up the mountain.) A down jacket is a wonderful piece of equipment for Kilimanjaro. Not only during summit night but also to sit around at dinner time when your body doesn’t generate heat through movement. (I find the evenings in camp by far the coldest part of everything…)You can’t beat down, but it’s expensive. If you’ll never need it again and if you can’t hire it (I always hire), then a few warm fleeces will do the job, provided you wear some windbreaker on the outside. Fleeces are great because they give a lot of warmth for little weight. Two or even three thinner ones are preferable over one single thick fleece, not only because you can better adjust your clothing to the temperatures. The main reason is that the air between clothing layers provides better insulation than the clothes. Wearing many layers is the key to staying warm on Kilimanjaro. I certainly recommend investing in some quality trekking pants. Mine are wind resistant, water resistant (not quite water proof but it takes heavy rain before it soaks in) and they even repel dirt (which isn’t essential, but nice if you spend a few months in Tanzania living out of a pack.) They weigh next to nothing and are very comfortable to wear. I can also unzip the legs and wear the pants as shorts. Two pairs are enough. Make sure your pants are big enough to comfortably wear over several thermal under layers. Don’t take heavy pants like jeans or similar. They offer no benefit, they only add weight and they will never dry if they get damp or wet. Thermal layers Thermal under layers have two functions. They insulate against cold and they draw moisture away from the body (they are breathable or wicking). But beware, that wicking effect only works if ALL the layers you wear do it. Most good fleeces are breathable and your rainwear also should be. As explained above, the key to staying warm on Kilimanjaro is wearing many layers, so bring a couple of pairs of long johns and long sleeved thermal tops. I use one pair to walk in and one bone dry pair to sleep in and to also wear on summit night. I can recommend the Icebreaker brand from New Zealand, because as the lady in the specialist shop who sold it to me explained: You can wear them every day for a whole month and you’ll still never be lonely, they don’t smell Everybody is different in their tolerance for cold, so do use your own judgment regarding how many and how high quality thermal under layers you take. Thermals come in different ratings. I live in the tropics and only the best and warmest will do for me. I also have a nice, comfortable pair of fleece pants to go over the long johns and under the trekking pants. Whatever you take, do make sure you’ll have dry clothes on summit night. Additional Kilimanjaro equipment for the cold You also need gloves and a wooly hat, and maybe something to cover your ears if the hat doesn’t. Get a nice, cozy, wooly hat. I never take mine off after the second night. I wear it walking, I wear it eating, and I wear it sleeping. Or get a balaclava. You probably won’t want to wear it so much around camp, but it will protect your face if you get a windy summit night. (And you can use it when you rob the bank to fund the whole trip.) Good gloves are very important. Your fingers don’t move or do anything on the way up, and since they’ll likely be clutching your walking poles they are very exposed to the elements. A thermal pair underneath and a water and wind proof pair over the top would be ideal. Some people say hand warmers aren’t needed, others say they are essential. You know what kind of person you are. Do you tend to get cold hands or feet easily? Do take hand warmers! The little oxygen activated sachets are cheap, take up no room and weigh nothing. The good ones stay warm for 12 to 16 hours and they are bliss to have. Yes, you can use them while clutching walking poles. Just shove them inside your gloves. I myself would not be able to do without them. Do get several packets and if you buy them on EBay or similar make sure you test them. I’ve seen the cheaper Chinese brands fail to do anything when opened. Kilimanjaro equipment for warm weather and around camp Most people bring a pair of trainers or similar to wear around camp. (I did only once and never wear them after the first night. My trekking boots are VERY comfortable, and the trainers are too bloody cold!) If you have light weight trekking pants you don’t need shorts. I sure wouldn’t take any. It’s freezing from the first night. You might want some light shirt for the time in the humid rain forest, but beware. The worst sunburns don’t happen on the summit, they happen on day one. I recommend a collared shirt. At least make sure you slap a generous amount of sunscreen on the back of your neck and, if needed, the shoulders. Sun protection Get the best sunscreen money can buy and start using it from day one. Don’t underestimate the power of the sun at altitude. Even 2000 m or 7000 ft. is enough altitude to make a serious difference in the amount of damaging UV rays that reach your skin. Also get something for your lips! Lips do not have pigmentation to protect them from the sun, and the wind, dust and dry air will also punish them. And get some very good sunglasses, especially for the summit day. You don’t want to become snow blind. Wrap around glasses or glasses with side protection are best, not only to keep out as much harmful radiation as possible, but also to protect your eyes from wind and dust. Take a sun hat or cap for the first days. You’ll need it for the rest of your stay in Tanzania anyway. Toiletries Don’t go overboard! Toothbrush, toothpaste, a little soap, deodorant and a mini towel are all the toiletries you’ll have use for. Talking of towels, don’t take the beach towel you brought for Zanzibar up on the mountain. Once it’s wet it won’t dry again. The ultra-light travel towels really come into their own on Kilimanjaro. Take enough toilet paper! And girls, the altitude can play havoc with your monthly cycle, so bring whatever you need, just in case. Other Kilimanjaro Equipment Walking poles are must have equipment on Kilimanjaro, especially for the way down. If you’ve never used poles before, get used to them on the way up, so they will protect your knees on the way down. After rejecting poles for years as something for oldies or city slickers with too much money, I eventually tried them for the sake of my knees. I took to using poles like a fish takes to water. Why did nobody ever tell me that they save your legs 30% energy on the way up? I don’t climb any mountains without them now. But my mom needed three treks at home until she got used to hers…I don’t think you need any fancy poles. Wooden sticks did the job in the past and did it well. Collapsible poles are handy if you lug your own around the world, but you can hire poles from your operator or even get them at Machame or Marangu gate though it may be the old style wooden version. A head torch is essential during summit night and also comes in handy around camp. Take enough batteries and keep them warm on summit night as batteries like to die in the cold. Most people carry water bottles for about three liters. Two liters is the absolute minimum. (Some people say you need more on summit day, we always needed less. This does depend on your personal needs. People who naturally sweat a lot will need more.)You will be able to refill your bottles during the day and in the evenings. The only exception is the summit attempt when your water has to last you to the peak and back down to camp. Most people prefer platypus type water bladders/camel backs. It makes it easy to drink as you’re walking. (Actually, easy is not the right word, because at altitude you will find it hard to walk and to hold your breath while drinking and to expend the extra energy to suck out of that bladder, all at the same time… Just you wait :-).)Still, most people find a camel back is more convenient than having a bottle in your pack. I never used a camel back. I can’t stand those things. I carry one or two smaller bottles on the outside of my pack where I or a climbing partner can easily get to them, and refill or change them during breaks. If you do get a camel back make sure it is fully insulated, including the tubing. Also make sure that during the summit night you ALWYAS blow the water back into the bladder or it will freeze in the tube and mouth piece. Add a Sigh style metal / aluminum water bottles to your Kilimanjaro equipment list. Why? They double as hot water bottles at night. (All water on Kilimanjaro needs to be boiled for drinking, and your team should boil a big tub every night to fill all bottles.) Wrap any damp clothing items that you want to dry around the bottle and shove it in the bottom of your sleeping bag before you climb in. Bliss and your clothes are dry in the morning. Most Kilimanjaro equipment lists recommend water filters or purification tablets. I don’t see the point. Your team should be boiling enough water for drinking for everyone. Before you buy any additional filter or tablets, consider that all your food and the soup and the tea and coffee etc. is also made with water that has only been boiled. As long as the water has been boiled properly it is safe. Having said that, if you climb with one of the budget operators, DO take a filter or iodine tablets. (Purification tablets need to be iodine, not chlorine.) Carrying all the water and boiling it costs money for porters and fuel, so on budget climbs you need to get and purify much of your water yourself. Even if they don’t make you get it, it is safer to purify your own. Depending on your other plans you may also need filter/tablets before and after your climb. You should also have a medical kit in your Kilimanjaro equipment, especially when doing budget climbs! I will write a separate page about that. Book This Tour

  • Parameters Edit •  Add / Share you knowledge with mates

    Base Camp Elevation: 2 740 m / 8 990 ft
    Summit Camp Elevation: 4 700 m / 15 420 ft
    Accommodation in Base Camp: Huts only
    Accommodation above Base Camp: Huts only
    Number of Camps: 9
    Avg. Cost: 2 000 USD
    Age Restrictions: 10
    Soloing: Yes
    Descent Route: Same
    Specify descent time: 2 Day(s)
  • Key Points Edit •  Add / Share you knowledge with mates

    Name (Elevation) Description
  • Agencies Edit •  Add / Share you knowledge with mates

  • GPS-Tracks

    Add
  • Did You Know Edit •  Add / Share you knowledge with mates

  • References Edit •  Add / Share you knowledge with mates

Last update: (31 May 2017) • History
Emmanuel Shoo

 Emmanuel Shoo 

43 years, Tanzania

Guide

500

Mountaineering, Hiking
Add to wishlist

0 climber who were here

Day 5

4
Kilimanjaro: Marangu Route
Duration: 5 days hiking
Price: $ 1500person
$ 1450person for groups of 3 – 6 people
$ 1250person for groups of 6 and above
Extra day on the mountain: $190/person

The Marangu Route is also known as the "Coca Cola" or "tourist" route. It is the easiest and shortest route to the summit. This is also the only route with the comforts of sleeping huts at every camp site with solar lights and comfortable beds. The huts are communal, and the bunks have a sponge mattress and pillow. There are 60 beds at both Mandara and Kibo Huts and 120 beds at Horombo Hut. Bathrooms and running water are available at the two lower huts. Mens' and ladies' latrines are available at the last camp but are very basic.
All climbing groups, often from several countries around the world, share meals in dining huts providing a jovial and energetic atmosphere. Soft drinks, bottled water, and beer may be for sale at the huts. Bring small Tanzanian bills to purchase these items (prices increase with elevation).
This route is usually done on 5 days but can be done in 6 days for better acclimatization. The extra day can be spent resting at Horombo or climbing the small peak of Mawenzi.
Marangu Itinerary
Moshi
815m / 2670ft Booked into your hotel in Moshi Keys Annex for overnight and briefing from your guide.
DAY 1
To Mandara Hut
1700m to 2740m
5500ft to 9000ft
7 km, 4-5 hours
Montane Forest After breakfast and briefing, drive to the Kilimanjaro National Park Gate (45 minutes), register and commence the climb. Walk through the rainforest to the Mandara encampment located at 9000 ft / 2740 m. A side trip to Maundi Crater is a good way to see the surroundings including Northern Tanzania and Kenya. In the rainforest, look for towering Eucalyptus trees, bird life, and Colubus monkeys.
DAY 2
To Horombo Camp
2700m to 3700m
9000ft to 12,100ft
11 km, 6-8 hours
Heathland After about 1 hour, you will leave the glades of the rainforest and follow an ascending path on the open moorlands to the Horombo encampment. Views of Mawenzi and the summit of Kibo are amazing. Look for giant lobelias and grounsels. You will start to feel the affects of the altitude.

If you wish to extend you trek, here you can spend an extra day resting at Horombo or climbing the small peak of Mawenzi.
DAY 3
To Kibo Camp
3700m to 4700m
12,100ft to 15,400ft
10 km, 6-8 hours
Alpine Desert Ascending, we now pass the last watering point, walking onto the saddle of Kilimanjaro between the peaks of Kibo and Mawenzi. Vegetation begins with upper heathland but then disappears into "moonscape". Dinner, rest, and prepare for summit climb.
DAY 4
To Summit and Horombo
4700m to 5895m
(and down to 3700m)
15,400ft to 19,300ft
(and down to 12,100ft)
4 km up / 14 km down
10-15 hours
Alpine Desert Very early in the morning (midnight to 2am), commence the climb to the summit on steep and heavy scree or snow up to Gilman's point located on the crater rim at 18640 ft / 5861 m (4-7 hours). Continuing, we now ascend to Uhuru Peak, which is the highest point in Africa: 19340 ft / 5895 m (1-2 hours). Unbelievable views at every turn. Get your picture taken at the summit to show your friends. From here, we now descend, stopping for lunch and a rest at Kibo before continuing on to the Horombo encampment for dinner and a tired but happy overnight (1-2 hours).

This beginning of this climb is done in the dark and requires headlamps or flashlights. It will be very cold until you start descending, so you will need all of your warm layers. This is, by far, the most difficult part of the trek with many switchbacks. "Pole pole" and an optimistic attitude will get you there!
DAY 5
To Moshi
3700m to 1700m
12,100ft to 5500ft
18km, 5-7 hours After breakfast, A steady descent takes us down through moorland to Mandara Hut (2700m / 8858 ft), the first stopping place at the Marangu route. Continue descending through lovely lush forest on a good path to the National Park gate at Marangu (1830 m / 6004 ft). At lower elevations, it can be wet and muddy. Gaiters and trekking poles will help. Shorts and t-shirts will probably be plenty to wear (keep rain gear and warmer clothing handy).

A vehicle will meet you at Marangu village to drive you back to your hotel in Moshi Keys Annex

Read more
Sort by:

show:

  • 6
  • 18
  • 36

Join the growing Alpine Community now.