
Viktoriia Vitova
37 years, Ukraine
7 years ago
How to create guided tour
1. The easiest way to start creating the tour is to click on the "plus" in the right upper corner of the screen.
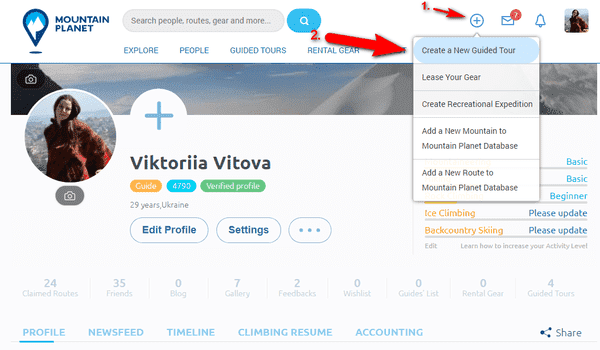
2. The Edit Tour window opens. Try to fill in all the fields as completely as possible.
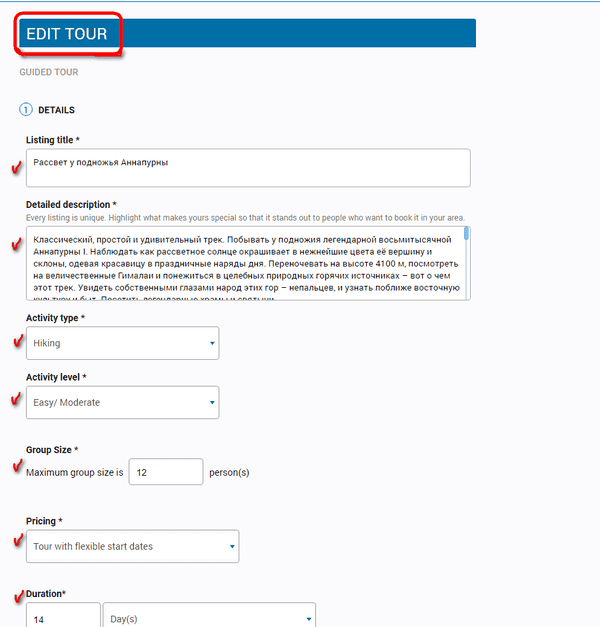
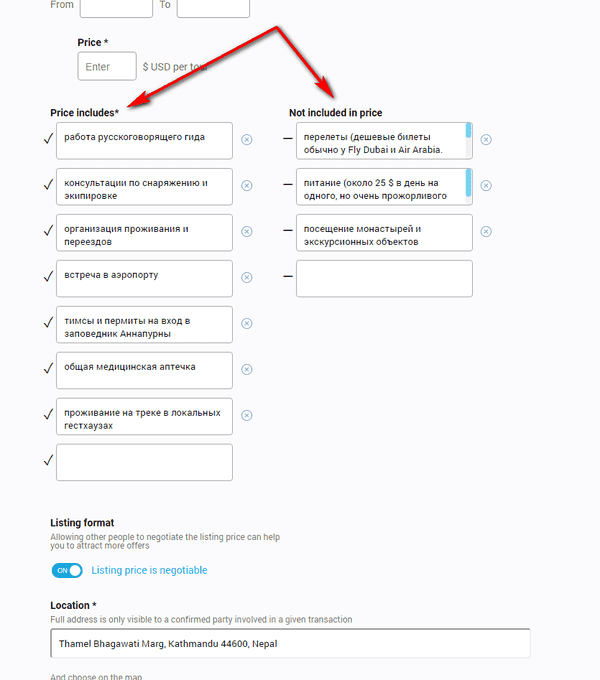
3. Pay special attention to filling in the fields about the included and not included in the price options.
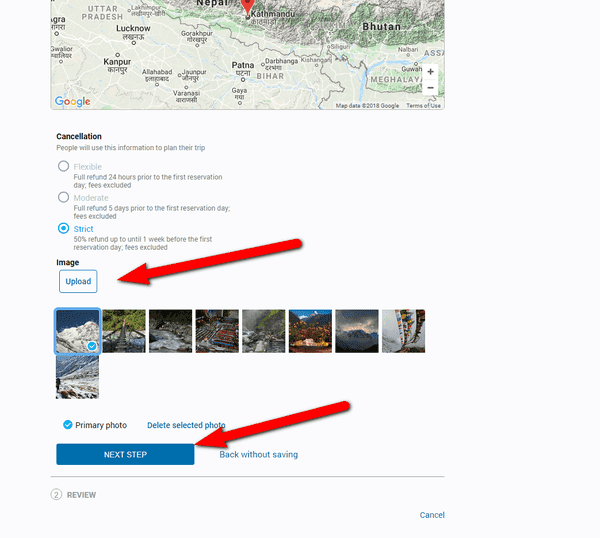
4. Upload few photo and click "NEXT STEP" if everything ok.
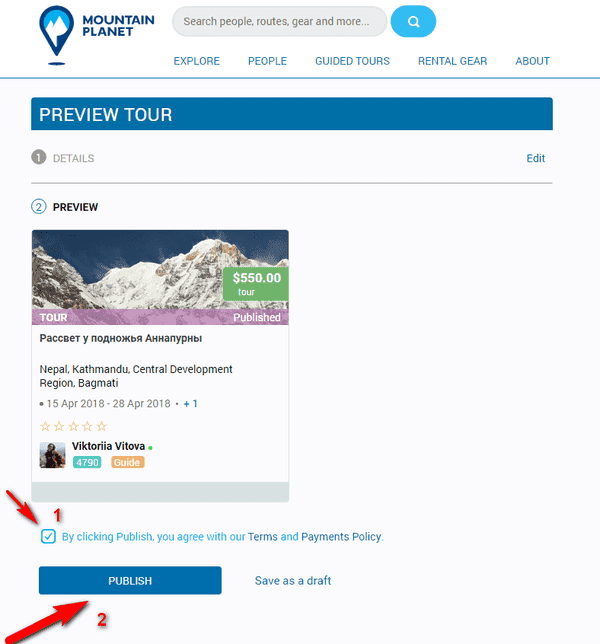
5. On the next screen you will see small preview of created tour. Fill chek box and click "PUBLISH" if you want to show the guided tour for everyone. If you click "Save as s draft" - only you will see this tour until you make all changes that you want and click "PUBLISH".
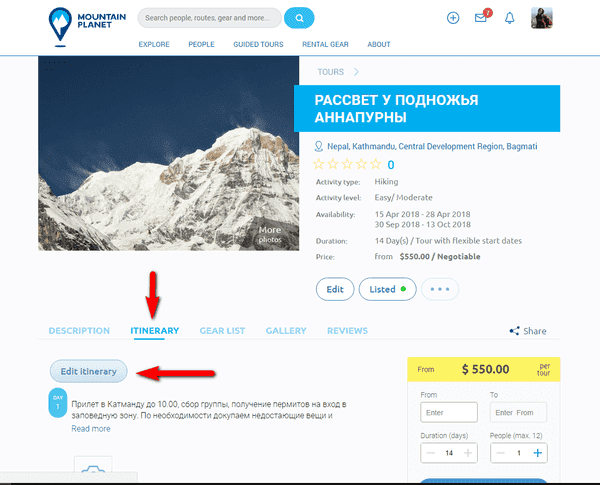
6. After basic information, fill in the rest of the parameters. Begin from itinerary (day by day description). You will find it in the created tour profile.
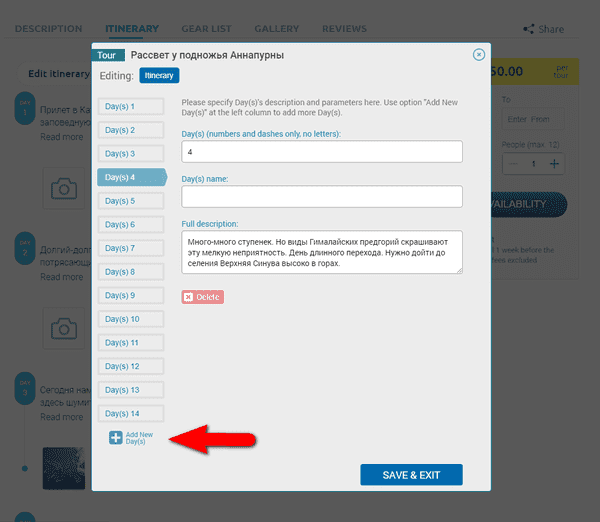
7. Here you can create full day by dat description. More days adds by button in the end of the screen.
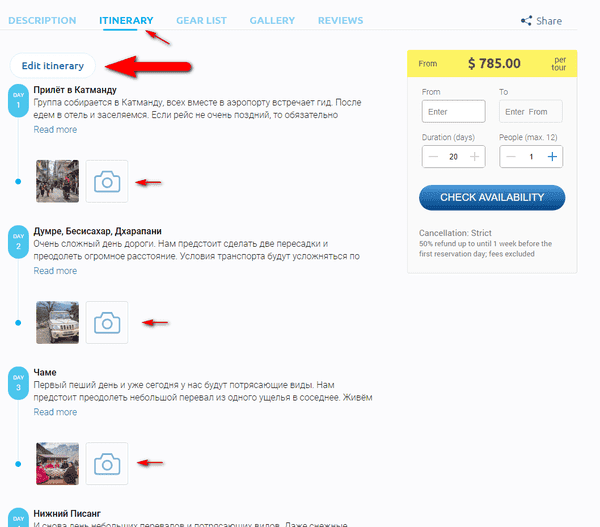
8. It is interesting for customers to see photos of each day. You can add them after previous step.
9. Сreate a list of equipment that will be needed on the tour.
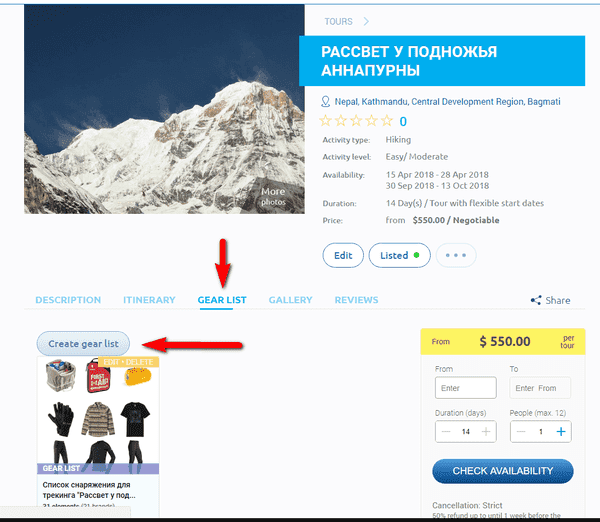
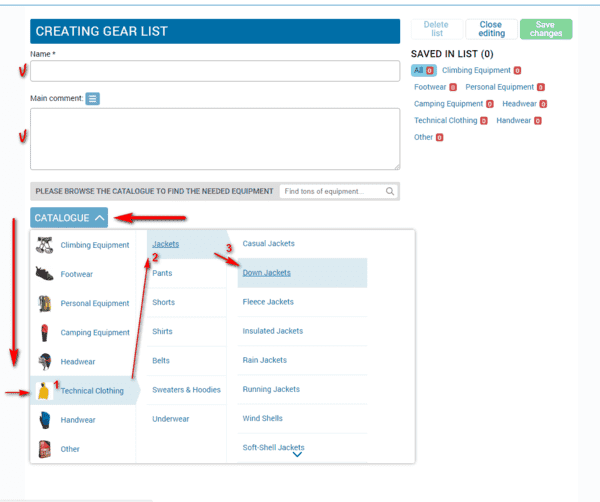
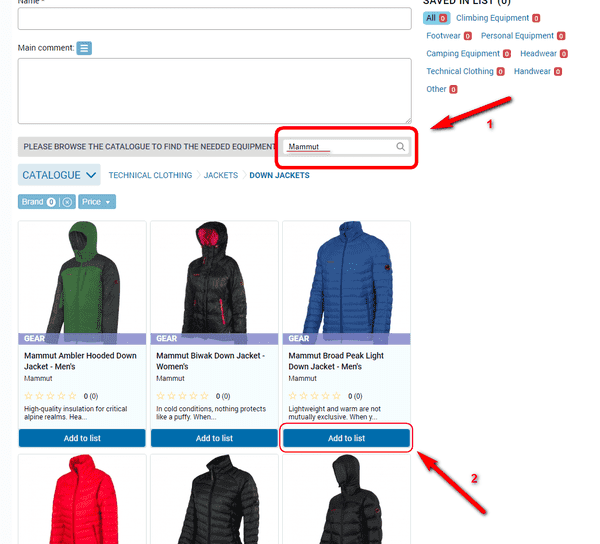
10. Fill name and main comment. There are two ways to find equipment that you need. First one by the catalogue. Just opened it and select what kind of equipment you need. For example, we looking for Down Jackets.
11. You will see a list of different down jackets. Choose the one that is the best for your tour.
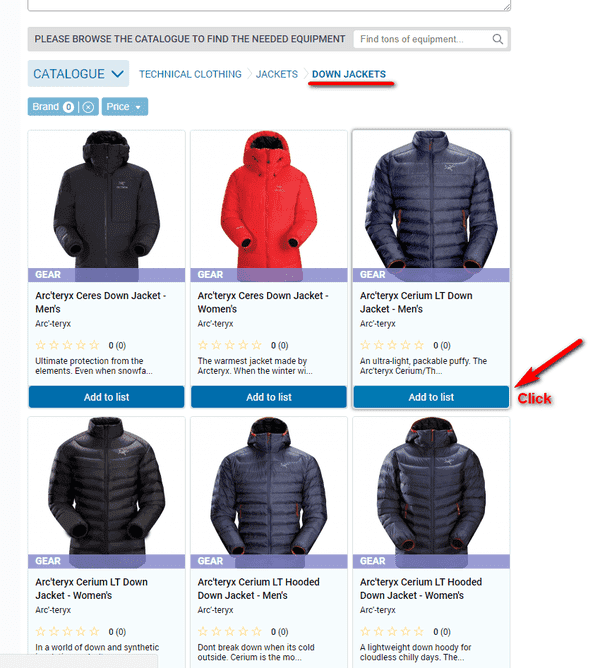
12. Add it to list.
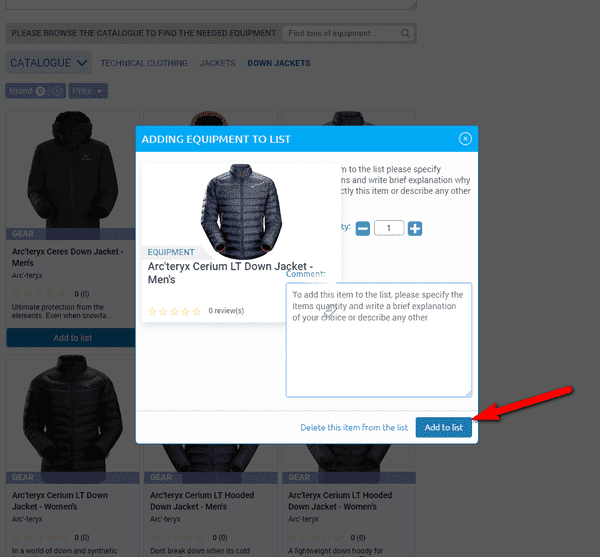
13. Second way to find equipment is through the search. Type what you are looking for and choose from the options found.
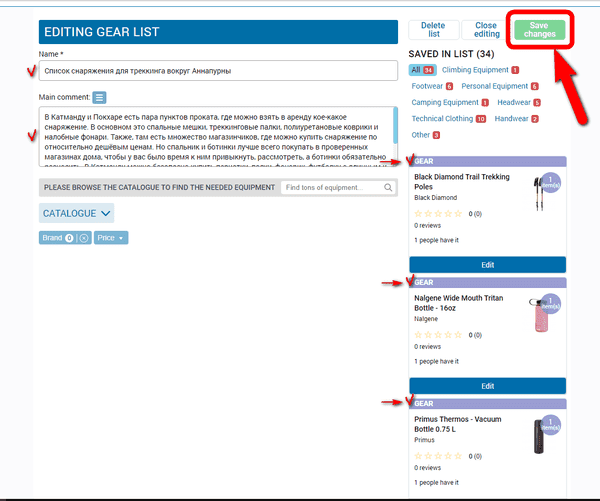
14. Check that you fill the name and main comment. Look at the list of gear in the right column and check it too. Then click "Save changes".
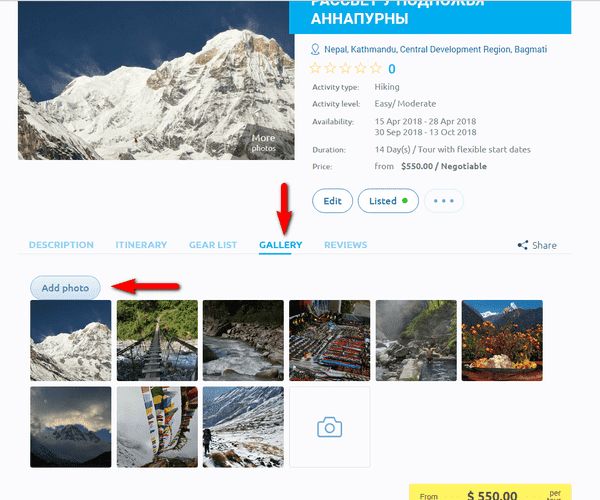
15. And the last but not the least - add more photo to your guided tour, about 10-12 pic.
16. When you do all this things for 8-10 of your tours, you will become the most trusted and attractive person for customers.
If you have any questions, please contact me at any time.
10 Things No One Tells You About Hiking in Nepal
2 Like
•
Viktoriia Vitova
Трек. Рюкзак. Девушка. Или "Тиличо через плечо"
2 Like
•
Viktoriia Vitova
How to fill up your profile
0 Like
•
Viktoriia Vitova
Trek. Pack. Girl. Or Tilicho Adventures
0 Like
•
Viktoriia Vitova
